
公告:“业余草”微信公众号 AI 中转站提供免费体验,点击链接 https://unity2.ai/register?ref=3XTnndN2 进行访问,支持 Claude、ChatGPT、Gemini 等最新模型!关注业余草微信公众号,添加作者微信:xttblog2!
本博客日IP超过2000,PV 3000 左右,急需赞助商。
极客时间所有课程通过我的二维码购买后返现24元微信红包,请加博主新的微信号:xttblog2,之前的微信号好友位已满,备注:返现
受密码保护的文章请关注“业余草”公众号,回复关键字“0”获得密码
所有面试题(java、前端、数据库、springboot等)一网打尽,请关注文末小程序

【腾讯云】1核2G5M轻量应用服务器50元首年,高性价比,助您轻松上云
本博客日IP超过2000,PV 3000 左右,急需赞助商。
极客时间所有课程通过我的二维码购买后返现24元微信红包,请加博主新的微信号:xttblog2,之前的微信号好友位已满,备注:返现
受密码保护的文章请关注“业余草”公众号,回复关键字“0”获得密码
所有面试题(java、前端、数据库、springboot等)一网打尽,请关注文末小程序
【腾讯云】1核2G5M轻量应用服务器50元首年,高性价比,助您轻松上云
这在以前,想要web实现上传图片时进行预览是很困难的。主要也是借助一些插件,flash等去实现。有的做法是在选择图片后,立刻上传,再将图片展现出来,做到预览效果;如果上传者不满意或者选错了,重新上传,则还需要删除原来的。看起来要做到图片预览是非常麻烦的。
但是在html5来临之后,这一切问题都是变得那么的简单了。先看看我的效果图吧:
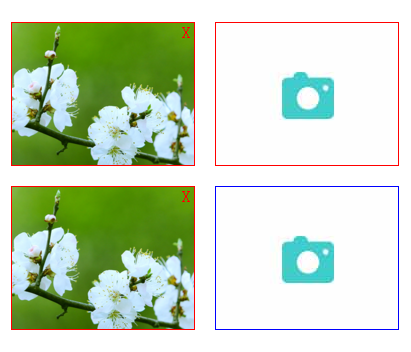
源代码如下:
<!DOCTYPE html>
<html>
	<head>
		<meta charset="utf-8">
		<title>使用HTML5实现上传图片预览功能</title>
		<script src="http://cdn.bootcss.com/jquery/1.11.1/jquery.min.js"></script>
		<style type="text/css">
			.imgbox,.imgbox1{
				float: left;
				margin-right: 20px;
				margin-top: 20px;
				position: relative;
				width: 182px;
				height: 142px;
				border: 1px solid red;
				overflow: hidden;
			}
			.imgbox1{border: 1px solid blue;}
			.imgnum{
				left: 0px;
				top: 0px;
				margin: 0px;
				padding: 0px;
			}
			.imgnum input,.imgnum1 input {
				position: absolute;
				width: 182px;
				height: 142px;
				opacity: 0;
			}
			.imgnum img,.imgnum1 img {
				width: 100%;
				height: 100%;
			}
			.close,.close1 {
				color: red;
				position: absolute;
				left: 170px;
				top: 0px;
				display: none;
			}
		</style>
	</head>
	<body>
		<div class="imgbox">
			<div class="imgnum">
				<input type="file" class="filepath" />
				<span class="close">X</span>
				<img src="btn.png" class="img1" />
				<img src="" class="img2" />
			</div>
		</div>
		<div class="imgbox">
			<div class="imgnum">
				<input type="file" class="filepath" />
				<span class="close">X</span>
				<img src="btn.png" class="img1" />
				<img src="" class="img2" />
			</div>
		</div>
		<div class="imgbox1">
			<div class="imgnum">
				<input type="file" class="filepath1" />
				<span class="close1">X</span>
				<img src="btn.png" class="img11" />
				<img src="" class="img22" />
			</div>
		</div>


	</body>
	<script type="text/javascript">
		$(function() {
			$(".filepath").on("change",function() {
				var srcs = getObjectURL(this.files[0]);   //获取路径
				$(this).nextAll(".img1").hide();   //this指的是input
				$(this).nextAll(".img2").show();  //fireBUg查看第二次换图片不起做用
				$(this).nextAll('.close').show();   //this指的是input
				$(this).nextAll(".img2").attr("src",srcs);    //this指的是input
				$(".close").on("click",function() {
					 $(this).hide();     //this指的是span
					 $(this).nextAll(".img2").hide();
					 $(this).nextAll(".img1").show();
				});
			});
		});

		function getObjectURL(file) {
			var url = null;
			if (window.createObjectURL != undefined) {
				url = window.createObjectURL(file)
			} else if (window.URL != undefined) {
				url = window.URL.createObjectURL(file)
			} else if (window.webkitURL != undefined) {
				url = window.webkitURL.createObjectURL(file)
			}
			return url
		}

	    $(function() {
			$(".filepath1").on("change",function() {
				var srcs = getObjectURL(this.files[0]);//获取路径
				var htmlImg='<div class="imgbox1">'+
						  '<div class="imgnum1">'+
						  '<input type="file" class="filepath1" />'+
						  '<span class="close1">X</span>'+
						  '<img src="btn.png" class="img11" />'+
						  '<img src="'+srcs+'" class="img22" />'+
						  '</div>'+
						  '</div>';
				$(this).parent().parent().before(htmlImg);
				$(this).parent().parent().prev().find(".img11").hide();
				$(this).parent().parent().prev().find('.close1').show();
				$(".close1").on("click",function() {
					 $(this).hide();
					 $(this).nextAll(".img22").hide();
					 $(this).nextAll(".img11").show();
					 if($('.imgbox1').length>1){
						$(this).parent().parent().remove();
					 }
				})
			});
		});
	</script>
</html>
原文地址:http://www.xttblog.com/?p=293

最后,欢迎关注我的个人微信公众号:业余草(yyucao)!可加作者微信号:xttblog2。备注:“1”,添加博主微信拉你进微信群。备注错误不会同意好友申请。再次感谢您的关注!后续有精彩内容会第一时间发给您!原创文章投稿请发送至532009913@qq.com邮箱。商务合作也可添加作者微信进行联系!
本文原文出处:业余草: » 使用HTML5实现上传图片预览功能